
General Information
Fuel
-
Storing a car with fuel in it is a funky way to store a car. The right way is to completely drain the tank, lines and carb bowl but that means removing the carb and turning it upside down.
-
-
Starting a stored car up every few weeks is ok but my experience is eventually the fuel will get stale after a few years (even if you use Sta-bil).
-
Ed
-
-
Having an electric fuel pump makes it easy to empty the fuel tank and lines by simply removing the fuel line at the carb inlet, diverting fuel into a waste container (use proper static grounding of course), and letting the pump run until the tank is empty.
-
Ed
-
-
Unfortunately, electric pumps don't like bad fuel either. In fact, nothing does. It will gum up your tank as well. It is best to use Sta-bil product in your tank to stabilize the fuel. But if you want to put in an electric, pump too, go for it. It certainly will help to empty your carburetor bowl.
-
Nathan Nuttall - ’67 Fastback
-
-
If you don’t Sta-bil the fuel in the tank, it’ll go bad or get very poor quality as it is hydroscopic (SP?) as it absorbs moisture. If you drain the tank for the off season, the fuel pumps are now dry and can freeze up making the pumps not turn when they are powered back on. You can use an electric pump through a vacuum pump as a primer, just turn it off and the vacuum pump will pull fuel through it just fine. Best bet is to fill tank and add Sta-bil to it before storing it. Full tank has less air in it for moisture buildup and less tank area to rust. You may end up with a tank of subpar gas come spring but it may be worth it. If you leave about a gallon in there to cover the electric fuel pump, then you have possible rust issues on the exposed tank surface. Best bet is to just start it once a week and let it idle to operating temp so as to boil out the moisture in the crankcase if at all possible. OF course if you live in a mild climate, no problem as you can drive it year round.
-
Steve W.
-
-
Try adding "dry gas" to soak up the water in the gas tank to prevent rust.
-
Ed
Fuel Pump
-
The stock pump should be adequate on a 300+ hp engine even with stock 5/16 fuel line if the line and filters are in good shape.
-
-
Top HP will dictate the max amount of fuel the pump needs to flow. Line size will make its job easier or harder. Of course at some flow rate, the 5/16 line will simply be inadequate with mechanical diaphragm pump.
-
-
You can use one with or without a regulator. Without a regulator, the cutoff pressure of 7 psi or less is the way to go. With too much cutoff pressure, it would also occasionally flood the carb at inopportune moments.
-
-
At 8.7 psi, use with a regulator.
Mechanical vs. Electric
-
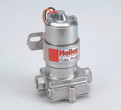
Mechanical fuel pump don't like sitting with (stale) fuel in them for years on end without starting. they may break down. If your going to replace the mech pump, consider an electric pump. Electric pumps only cost about $50.
-
-
The idea is to wire the electric pump so that it runs when you crank the engine, runs when the engine runs, but stops when the engine stops (wired through an oil pressure switch which I'd have to T-off of the oil sender unit).
Electric Fuel Pump Conversion
-
You need to question what oil pressure switch to use (it has to have conductivity when engine has oil pressure, not the other way around like for idiot lights) and cut off when engine stops, yet we need a special parallel circuit (probably a relay) that let's the fuel pump run when cranking.
-
Ed
-
-
1) the fuel line has a chance to pressurize in the IGN "RUN" key position, before you crank the engine, allowing your carb accel pumps to squirt and your engine to fire up instantly. I like that from the sound of the electric pump, you can hear the fuel pump suck fuel from the tank and it changes tone when the system is pressurized. If you don't hear it change tone, you know it's either sucking air (cavitating) or the fuel system isn't pressurizing (leaks, float valve stuck open, etc).
-
-
2) you can install a cut off switch to turn off the fuel pump and let the engine idle until it stalls, which partially empties the carb fuel bowls and allows the float valve to dry up without varnish sticking it shut (for when you start it again after a long storage). With stale fuel, my float valves often stick shut after a car has been sitting, requiring me to open up the float bowl and clean the float valve.
-
-
3) On the subject of stale fuel, having an electric fuel pump makes it easy to empty the fuel tank and lines by simply removing the fuel line at the carb inlet, diverting fuel into a waste container (use proper static grounding of course), and letting the pump run until the tank is empty.
-
Ed
Fuel Pump block off plate and safety cutoff switch
-
Questions:
-
1) You’ll need to bypass the oil pressure switch so you can power the pump when cranking. Probably need a relay.
-
2) You’ll also need an oil pressure switch, the kind that grounds when there is oil pressure.
-
Ed
-
-
Consider Standard Motor Products PS-64. Three lug. One to switched power on, one to ign. start, one to fuel pump. Included is a text file with the wiring specifics. It is a lot less complicated if you can go to external on the pump. Setup for 55 psi EFI fuel pump.
Switch:
Text file:
-
No experience personally but have heard a lot of people recommend the Walbro pumps.
-
-
Michael Mosley - ’68 ‘Cuda
-
Aftermarket Fuel Pumps
-
Carter mechanical pumps have always been a good brand.
-
Summit has a selection of Carter pumps. RockAuto carries Carter pumps also.
-
-
For non-regulator applications, the one Carter used to call "Super Street" M6902 is a better choice than the "Competition" M6270 when used without a regulator. The Carter M6270 has a cutoff spec of 7.5 psi.
-
-
The Carter M6866 linked to is a stock style pump and has a max pressure spec from 5-6.5 psi.
-
http://www.summitracing.com/parts/crt-m6866/overview/make/plymouth
-
-
Walbro comes up as the most recommended for an in-tank pump. It provides the pressure, volume and reliability. A Corvette filter/regulator seems to be the easiest way to go on the bypass regulator. You can mount them at the rear close to the tank and they are only about $35. There are all kinds of opinions about in-tank baffles, whether you need them or not. I think there are about as many opinions as there are pump, filter, regulator combinations.
-
-
I have an Aeromotive A-1000 in tank pump.
-
-
I have heard plenty of stories about people trying to use electric pumps without baffles or without a tank designed for them where they cannot run low on fuel. One guy was telling me he can't run less than a 1/4 tank. In tank pump is always best if possible. Makes it much quieter and the pump is immersed in "coolant". Baffles are there to keep fuel from sloshing and help direct fuel to the pickup. Pickup (or pickups) needs to be at the lowest point in the tank, in a sump, or at the rear corners if in a flat fuel cell. Electric pumps work better if you can run a return system, though that makes the plumbing more complex. Some systems require a return line. I have seen some creative solutions on "For A Bodies" and Moparts where guys drop a pump in the stock pickup / fuel sender location.
-
-
Something like this may work also: http://www.tanksinc.com/index.cfm/page/ptype=product/product_id=84/category_id=61/home_id=-1/mode=prod/prd84.htm
-
Michael Mosley - ’68 ‘Cuda
-
-
Car Craft had a pretty comprehensive feature on fuel pumps not too long ago. The one they recommended was called Phantom or Stealth or something like that. It seemed to be a complete package with regulator that they thought was easy to set up.
Fuel Line
-
Fuel lines come in original material vs stainless and 5/16" vs 3/8".
-
Your stock pump and 5/16 line are enough.
Upgrade Fuel Line
-
If you want to upgrade, then do a 3/8-inch main fuel supply line from tank/fuel sender all the way up to the carb. If your car has a return line, use it In conjunction with the regulator and the high flow pump.
-
-
Your ‘Cuda will run better. That set up will take you to some high hp levels In The street.
-
You can reference the big block fuel line sizes vs. there HP ratings and see the 5/16 line goes far.
-
This upgrade only takes a few minutes.
-
-
When I started my restoration of my '67 fastback, I trashed the existing 5/16 line and replaced it with a new 3/8 line. I recommend you do the same. Better to plan for the future than have to put new line in later.
-
Dr. Bob
3/8” vs. 5/16”
-
If you go with 3/8 you’ll have to get a different sending unit (non-stock), and the aftermarket ones are not very satisfactory.
-
Max Heim - ’67
Stainless Fuel Line
-
Stainless looks good, but is stiffer and harder, making it harder to bend and route, and prone to leaking at the flare fittings because they don't conform as easy. If you do get stainless, use permatex teflon thread sealer on the threads and behind the flares. Also, if you ever need to flare the stainless, it is very difficult to do with an inexpensive flaring tool. You would most likely need to buy a $200+ tool, or have someone do it for you.
-
Ron Evans - ’67 vert, ‘67 notch
Fuel Line Manufacturers
-
You can get a new fuel line from Inline Tubes.
-
-
ClassicTube supplies lines for our models.
-
Tim Moller - ‘69 Cuda Conv.
-
I went with FineLines and was extremely pleased.
-
Rob Robinson - ‘68 Fastback
Fuel Line Installation
-
Replacing a fuel line is not a simple process and I had to massage it into place. Fortunately I have a lift and the process is easier when you can get a good look at everything particularly the line clips and locations. My recollection is that I installed everything from back to front and had to do some turning of the line to get it over the axle and moving forward. Having a second set of hands helps too.
-
D Martin
Bending Fuel Line
-
You may want to attempt to bend your own pump-to-carb fuel line. If so, get a length of line and a cheap bending tool. It isn't too hard. Definitely something you'd get better at with practice, though. You will need to cut it and flare the end. The fuel inlet on the Holley carb is in an unusual (ie. driver's side) location, so bending your own line is probably your only choice. Practice makes perfect. You may have to throw away your first trys.
-
Jeff Ramin - ’67 Coupe
-
If you are not going to bend your own fuel lines, I've heard good reviews for
-
The 5/16" fuel lines are stock and should be more than enough for your application.
-
Jim Conner
Carburetor
Original Carburetor Specs
1969
-
Carburetor Number4608
-
Carburetor Type C-2-BBD
-
Application 318 A/T
1970
-
Carburetor Number4722, 4724 (318 A/T (California - ECS))
-
Carburetor Type C-2-BBD
-
Application 318 A/T
-
Mopar Carter Carburetor Numbers
-
14139 C-4-AFB 67 426 Front
-
24140 C-4-AFB early.67 426 Rear
-
34173 C-1-BBS 67 225 Taxi
-
44286 C-1-BBS 67 170 M/T
-
54287 C-1-BBS 67 170 A/T
-
64288 C-1-BBS 67-68 170 M/T Canada
-
74289 C-1-BBS 67-68 170 A/T Canada
-
84290 C-1-BBS 67-68 225 M/T Canada
-
94291 C-1-BBS 67-68 225 A/T Canada
-
104294 C-4-AFB 67 273 M/T
-
114295 C-4-AFB 67 273 A/T
-
124296 C-2-BBD 67/O 383 M/T
-
134297 C-2-BBD 67/O 383 A/T
-
144298 C-4-AFB 67/O 383 M/T
-
154299 C-4-AFB 67/O 383 A/T
-
164302 C-1-BBS 67 170 M/T California
-
174303 C-1-BBS 67 170 A/T California
-
184304 C-4-AFB 67 273 M/T California
-
194305 C-4-AFB 67 273 A/T California
-
204306 C-2-BBD 67/O 383 M/T California
-
214307 C-2-BBD 67/O 383 A/T California
-
224309 C-4-AFB 67 383 M/T California
-
234310 C-4-AFB 67/O 383 A/T California
-
244311 C-4-AFB 67 440 M/T California
-
254312 C-4-AFB 67 440 A/T California
-
264318 C-4 66/O 383 A/T California
-
274324 C-4 67 426 All/T Front California
-
284325 C-4 67 426 M/T Rear California
-
294326 C-4-AFB 67/O 440 A-134 M/T
-
304327 C-4-AFB 67/O 440 A-134 A/T
-
314328 C-4-AFB 67/O 440 A-134 M/T P/P California
-
324329 C-4-AFB 67 440 A-134 A/T P/P California
-
334343 C-4 late.67 426 Rear
-
344401 C-4-AVS 68/O 383 A/T (Non A/C)
-
354402 C-4 67 426 A/T Rear California
-
364414 C-1-BBS 68 170 M/T
-
374415 C-1-BBS 68 170 A/T
-
384416 C-2-BBD 68 273 M/T
-
394417 C-2-BBD 68/O 273 A/T
-
404418 C-2-BBD 68/O 318 M/T Canada
-
414419 C-2-BBD 68/O 318 A/T Canada
-
424420 C-2-BBD 68/O 318 M/T
-
434421 C-2-BBD 68/O 318 A/T
-
444422 C-2-BBD 68/O 383 M/T
-
454423 C-2-BBD early.68/O 383 A/T
-
464424 C-4-AVS 68 340 M/T
-
474425 C-4-AVS 68/O 340 A/T
-
484426 C-4-AVS 68 383 M/T Except RR and Super Bee models
-
494430 C-4-AFB 68 426 All/T Front
-
504431 C-4-AFB 68 426 M/T Rear
-
514432 C-4-AFB 68/O 426 A/T Rear
-
524463 C-2-BBD late.67/O 318 All/T Canada
-
534578 C-2-BBD late.68/O 383 A/T
-
544601 C-1-BBS 69 170 M/T
-
554602 C-1-BBS 69 170 A/T
-
564605 C-2-BBD 69 273 M/T
-
574606 C-2-BBD 69/O 273 A/T
-
584607 C-2-BBD 69/O 318 M/T
-
594608 C-2-BBD 69/O 318 A/T
-
604609 C-2-BBD 69/O 318 M/T Canada
-
614610 C-2-BBD 69/O 318 A/T Canada
-
624611 C-4-AVS 69 340 M/T
-
634612 C-4-AVS 69/O 340 A/T
-
644613 C-2-BBD 69/O 383 M/T
-
654614 C-2-BBD early.69/O 383 A/T
-
664616 C-4-AVS 69/O 383 A/T
-
674619 C-4-AFB 69 426 All/T Front
-
684620 C-4-AFB 69 426 M/T Rear
-
694621 C-4-AFB 69 426 A/T Rear
-
704635 C-4-AVS 68/O 383 A/T & A/C
-
714636 C-4-AVS 68/O 340 A/T & A/C
-
724637 C-4-AVS 68/O 440 A-134 A/T & A/C
-
734638 C-4-AVS 69/O 383 A/T & A/C (340 M/T also?)
-
744639 C-4-AVS 69/O 340 A/T & A/C
-
754640 C-4-AVS 69/O 440 A-134 A/T & A/C
-
764682 C-4-AVS 69/O 383 (335HP) A/T (RR, Super Bee, Dart GTS and Barracuda)
-
774711 C-4-AVS 68-69 383 (335HP) M/T (RR, Super Bee, Dart GTS and Barracuda)
-
Electric Choke
-
When using a carb with an electric choke, you can tap into a couple of locations to pick-up power.
-
-
Ran mine back to the bulkhead connector and to an ignition on/12V source.
-
Tim Moller
-
-
I tapped into the power side of the ballast resistor using a spade-type slide on female terminal with a male piggy-back. That way the original wire harness would not be changed.
-
-
Other means like tap into the positive side of the coil, or on some older mustangs, tap into the starter solenoid.orinto the starter relay.
-
-
DO NOT tap into output wire of the alternator. The choke will melt, then the carb may catch fire.
-
Shane Toomay - ‘68 Fastback
Carb Choke Power - Tie in
-
Where do you guys (gal) like to tie into for power to the choke.
Tim Moller - ’69 Cuda Conv -
I like to power from the blue wiper motor wire. It is ignition switched and protected by a internal resettable breaker in the wiper switch. If it shorts or burns up you may loose the wipers until you disconnect it at the carb. If you tie to the ballast run side you have no protection! Also I prefer not to have anything tied on that circuit short of ignition/coil!
Gerald Drury -
Back when I had the 300 horsepower 318 in my Barracuda, I ran an electric choke on an Edlebrock 650 cfm carb. I powered it to the power side of the ballast resistor with an in-line fuse. Ran that setup for 8 years with no problems.
Shane Toomay -
I used a fuse which I would recommend, no matter where you pull the power from.
Eric - ’69 B5 408 FB -
That's just fine if you do not mind having extra stuff cluttering up the bay.
-
I chose to hide it and still be safe. Used a blue feed wire at crimped at the bulkhead with the wiper feed. You would be hard pressed to notice it.
Gerald Drury
Carburetor with Electric choke
-
Edelbrock 650 carb
-
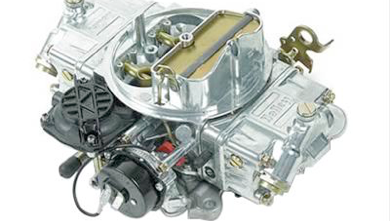
Holly 4-barrell carburetor
Carburetor Throttle Return Spring
-
Remove the throttle return spring bracket and throttle cable bracket from your carburetor. You should be able to use it from a 318 and put them on a 340. Derusted and paint the throttle return spring bracket and throttle cable bracket.
-
Jeff Ramin - ’67 Coupe
-
-
For the drivers side of the engine: Mopars Unlimited in Quebec stocks the kickdown return spring which is actually correct. Get a throttle return spring from the local Ace hardware store. The throttle return spring anchor is a Mr. Gasket standard piece from O'Reillys.
Carburetor with Electric choke Wiring
-
When wiring up the electric choke it seems the best place to power it is from the battery terminal of the alternator.
-
Jeff Ramin - ’67 Coupe
-
-
I like to power from the blue wiper motor wire. It is ignition switched and protected by a internal resettable breaker in the wiper switch. If it shorts or burns up you may loose the wipers until you disconnect it at the carb. If you tie to the ballast run side you have no protection! Also I prefer not to have anything tied on that circuit short of ignition/coil! I chose to hide it and still be safe. Used a blue feed wire at crimped at the bulkhead with the wiper feed. You would be hard pressed to notice it.
-
Gerald Drury
-
-
Back when I had the 300 horsepower 318 in my Barracuda, I ran an electric choke on an Edlebrock 650 cfm carb. I powered it to the power side of the ballast resistor with an in-line fuse. Ran that setup for 8 years with no problems.
-
Shane Toomay
Changing Holley Carburetor to Edelbrock Performer
-
The general procedure was:
-
•Buy the Chrysler throttle adapter (also off ebay).
-
•Buy new fuel line for the run from the fuel pump to the carb. The Holley inlet was on the driver's side; the Eddy inlet is on the passenger side.
-
•Buy new vacuum hose for the run from the PCV to the carb; it's a slightly longer length for the Eddy.
-
•Buy a new carb base gasket. I could've used the old one, but it was an open center, which really isn't correct for a dual plane intake.
-
•Buy a new fuel filter.
-
•Remove alternator.
-
•Remove old fuel line.
-
•Disconnect throttle cable and all hoses from the Holley.
-
•Remove the Holley.
-
•Bolt on new gasket and carburetor.
-
•Bend new fuel line (purchase a bender from Napa).
-
•Attach throttle linkage, vacuum hoses and fuel supply.
-
•Re-install alternator.
-
•Crank her up!
-
Jeff Ramin - ’67 Coupe
Accelerator Cable
-
The linkage from the old Carter carburetor is different than on the Holley.
-
-
When you change the intake manifold and carburation configuration you often need:
-
1.) a longer carb throttle rod
-
2.) a longer throttle cable to maintain the linkage geometry and insure that the tranny kickdown operates correctly so everything works smoothly all the time.
-
But It's cheaper to put in the correct parts.
Slant 6 A-body throttle control cable
-
To be specific: #2899335 ( IS-532 2899 335 ), length 24.38"
Replacement Cables
-
Just go down to your local auto parts store.
-
NAPA has them and cost about $10-14 dollars.
-
Phil Saran
-
-
Bought it new, Pioneer part number CA-8418. Autozone $27.
-
Michael Mosley
-
I found it under the same number (CA8418) at O'Reilly auto parts, and discovered the same cable under another part number, Y155, by another manufacturer. The secret search key is : 72-75 Valiant with 3.7L six cylinder engine. Price locally here on the left coast is in the $18-$22 range. Length 24.25 inches.
-
If possible use the OEM replacement style, Mopar did a lot of things right. I use Pioneer part number CA-8418, never had a problem with it. This is /6 length, but the extra length worked out great for the high rise dual plane on the 440. Rock Auto priced at $17.41.
-
-
http://www.rockauto.com/dbphp/x,catalog,688,partnum,CA8418,d,PIONEER_CA8418.html
Throttle Cable Repair
-
A frayed and damaged throttle cable may finally give out. If you have a welder, you could weld a small blob onto the end of the cable to keep it from popping off if you like.
-
Nathan Nutthall
-
-
You might be able to get a cable stop at the hardware store - one that the cable goes through and you tighten it with a set screw.
-
Jim Conner
-
-
My other car has several small screw-type clamps for cables. Basically, it’s just a bolt with a hole drilled though the shank. Add a washer or two and tighten the nut down on the cable. I suppose it would need to be sized for the socket thingie in the pedal.
-
Max Heim
-
-
Home Depot sells the aluminum sleeve that you can crimp into the cable (using a long handled crimping tool they also sell). I haven't tried these on throttle cables so try at your own risk. They also sell aluminum sleeves designed to crimp over two cables to form a loop in the cable. Looping the cable would reduce the "pull out force" on the crimped cable to 1/2. They're in the hardware section, near the stranded cable, along with the huge crimper tool that mashes the heck out of it. I think the smallest size crimp is 1/16" cable.
-
Ed
-
-
Cable stops (type being referred to) are plentiful...check with your local auto store, or:
-
-
Tim Moller
-
Had this happen on my 67 notch.. The Lokar cable kept pulling through the wimpy set-screw they had.. Ended up welding a short little wire piece and then using the two-sided crimp mentioned in later replies.. I will say that the Lokar wasn't super great, since later when I replaced it with the Bouchillion (spelling..?) Performance stock style cable I realized the wire was sawing through the cheap aluminum housing through the firewall.. Sort of scary.. Either way, the Bouchillion kit worked great.. It was $$$, but everything fit like it should, the kickdown worked, and so on..
-
Raj
Gas Pedal
-
-
-
FOR USE ON GAS PEDAL TO FLOOR
-
RTS Specialites Price: $1.50
-
Air Cleaner
-
Some original Plymouth air cleaners were the pie pan shape.
Air Cleaner Restoration
-
Repaint the plate the original color and then get a decal and put it on.
-
Mike Jarvie - ’68 Fastback
Air Cleaner Decals
-
The originals were silk screened right on the aluminum. Classic does sell the decals.
-
Alan
Aftermarket Air Cleaner
-
They can be bought from Classic Industries.
-
Air Filter
6 pack Air Cleaner
-
Custom made six pack air cleaner assembly.
-
Six pack air filter element is 15.75"x19.75"x2" and K&N makes both a 2" and 3" version.
-
-
Hybrid-fiberglass-solutions.com in Houston makes really nice fiberglass reproductions of the six pack bases. Steve is sending me one of their bases with a minor change in the mold to better fit the EFI. Should net me more than a 1" filter drop once I modify the center to fit the EFI throttle bodies. Steve is sending it with the holes cut for carbs. The holes are on the same spacing but need to be much larger for the EFI, I will cut the holes larger myself in case I need to shift it forward a bit. If I want to do a 3" filter version I can section it, raise the center and glass the two pieces back together. Some pictures from my fitment testing:
-
http://www.forabodiesonly.com/mopar/showpost.php?p=1970307148&postcount=185
-
Michael
-
Vapor Lock
-
Technically, this problem is referred to as fuel starvation, and it can have many causes including a clogged fuel filter, fuel lines routed in hot areas, or the carburetor float bowls being adjusted too low. To deal with fuel starvation, you need to start at the root of the system, the fuel tank and sending unit. If the fuel gauge always read empty, this indicates that the float had possibly filled with fuel and sank to the bottom of the tank. Check the fuel pickup and sending unit.
Fuel (Gas) Tank
Year Differences
-
The ‘67 tank has one single strap that runs from side to side.
The ’68 and ’69 have 2 straps that run front to back. -
The ‘68 tank is not different but the filler neck angle sure is. There are possibly two different filler neck diameters, a 1-7/8” and a 2”.
Mike Wingeier - ’67 FB, ’69 FB -
The filler necks are different between the fastback and the coupe/convertible.
Max Heim - ’67 Conv.
Dropping the Tank on a ‘69 Coupe
-
It could be different from a fast back or convertible. Be careful when you remove the filler tube not to push on the fender, as the fender could be moved too far and bent. Instead, push the filler tube a little farther inside the tank and then pull it up and out. Or loosening the tank first might help get the tube away from the fender.
-
-
Carefully save the tar paper gasket that sits on top of the tank, so you can copy it in new tar paper, because plan on repros you might buy to be right for somebody's car but wrong for your car.
-
Kent J
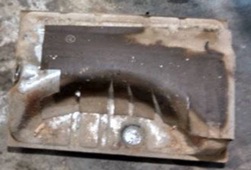
Fuel Tank Rust
-
The top inside surface of the tank seems to get the most rust, as more water condenses up there. Your tank may have dozens of perforations on the topside and not elsewhere, so it maybe toast. Lots of posts on moparts.org and elsewhere about sending unit woes, so your best option is to restore your rusty original or send it out. You can find restorers listed in Hemmings Motor News.
-
Kent J
-
-
Pull the tank and have it checked for rust and leaks. Take the tank to a local shop for boiling it out / cleaning. Consider the possibility that the tank might have to be replaced because there is too much rust to be fixed. Mine had some holes and was repaired. The float/sending unit has to be replaced because of major rust and the tank had gas in it all the time. What I drained out of the tank when I removed the tank was no longer gasoline and had very bad smell to it. Is it worth the effort? YES because getting this far you do not want to take the chance to do damage to the fuel pump or the carb.
-
Darrell Stephens
Cleaning the Inside of a Fuel Tank
-
POR15 sells a gas tank cleaner.
-
Jay Leno
-
DIY Fuel Tank Repair
-
It may be possible to patch your old tank, but you probably have to pull it before you can evaluate it. Note that shops are reluctant to solder fuel tanks because off the danger of fumes igniting. My dad patched his with JB Weld, and that seems to be holding up.
-
Max Heim - ‘67 Fastback
-
You can apply new solder yourself with solder-melting heat on bad areas that have had the rust completely removed.
-
-
PR7 also works depending on the required repair.
-
Powder Coating the Outside of the Fuel Tank
-
Powder coating the outside won't stop rusting, as tanks rust from the inside out. The original tanks were made from terne sheet, which is lead / tin (same as solder) coated steel.
-
-
If the old lead / tin coating is mostly still there, I wonder if powder coating will stick to it? Mild abrasive powder with vinegar might shine it up like new, but it will darken in time from air exposure, just like lead and tin do. Since gas tanks mostly aren't visible anyway, a spray of undercoating to the underside would be one solution.
-
Kent J
-
Coating the Inside of the Fuel Tank
-
An epoxy or polymer type coating is available that is fuel and moisture resistant to prevent the tank from rusting out from the inside in the future.
-
Mike Jarvie - ’68 Fastback
-
-
I've heard nightmare stories about some ceramic coatings that flaked off and trashed carburetors and fuel pumps.
-
Jim Conner - ’68 Cuda
-
This product is used on airplanes.It is probably safe to use on your car .
Indentations
-
The indentation is the one that runs crosswise along the rear of the rear floor pan that is spot welded to the forward lip of the trunk floor pan. It is about 28" long, about 5/16" deep, with 9/16" dimples at each end. There is an identical pattern on the stock gas tanks. It undoubtedly ads strength, but it also serves to register the gas tank in place.
-
Ron Evans - ‘67 Coupe
-
-
The "indentions" in the trunk floor are stiffening ribs to strengthen the floor panels, and to eliminate any "oil canning" or flexing in the panels. The beads formed into the trunk floor pan are there only for strength.
-
Michael Mosley - ’68 Cuda
-
-
Note: If water gets into the trunk, the indentations may hold the water and the metal will eventually rust through.
-
Jim Conner - ’68 Cuda
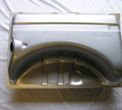
Aftermarket Fuel Tanks
-
A new tank is made by Spectra Premium (Made in Canada) ones are widely available for around $150, they look to be the same as the Ni-Terne Steel.
-
-
New repro tanks are available for around $120-$150 from Herbs Auto Parts, Dante's and several others.
-
Max Heim - ‘67 Fastback
-
-
Classic Industries has 3 options:
-
Zinc Coated Steel ($110)
-
Ni-Terne Steel ($200)
-
Stainless Steel ($250)
-
-
Tanks Inc. have a very good reputation and have good reviews of those that they fit for in-tank fuel injection pumps
-
-
I have heard some repro tanks are not totally correct as the maker does not make every single tank for all the minor differences, opting for one model to fit many or all A bodies and years.
-
Kent J
-
-
Here's a current thread on this topic:
-
http://board.moparts.org/ubbthreads/showflat.php?Cat=0&Number=7839599&an=0&page=0&gonew=1#UNREAD
-
You'll probably have to go with new straps, pad and j-bolts.
Fuel Tanks Components Color
-
Gas Tank N Natural Steel or Aluminum
-
Gas Tank Straps N/GB Natural Steel or Gloss Black
-
Gas and Brake Lines N Natural Steel
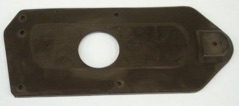
Fuel Tank Pad Insulation
-
The top of the tank needs a pad for insulation, noise and damage prevention. The original ones were 0.080” thick.
-
-
Mopar A Body 67-76 Fuel Gas Tank Pad Insulation - .070" Felt Paper PLUS Grommet & Sending Unit Seal
-
DMT OEM style felt paper gas tank pad PLUS fuel filler tube to tank grommet and sending unit to tank seal for 67-69 Barracuda.
-
$29.00
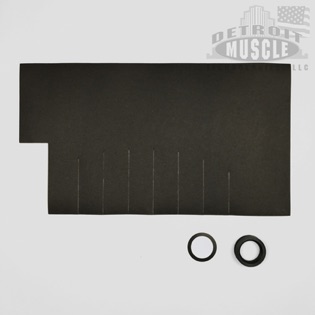
-
Here is the one I bought.
-
Mike Hasuga
Alternative Fuel Tank Pad Insulation
-
The black felt on the gas tank is used as a sound deadener. The material is similar to that used for roofing. It is glued on the top of the tank and goes between the tank and the chassis.
-
-
-
-
I used 30# roofing felt.
-
Alan Erland
Mounting the Gas Tank
-
Sounds easy, but there are a lot of things to consider. One thing is how to keep the tank from "creeping" when using the stock-type mounting straps. The stock design does that by placing indentations in the floor pan, just behind the shock-mount cross member. The stock type tanks have matching indentations.
-
Ron Evans - ‘67 Coupe
-
Actually installing the tank isn't too difficult but it is tedious. Tightening the nut on the J-bolts is a pain. After I got it in place I noticed it's askew (slightly rotated about the spare tire well). Get it all lined up or you’ll probably have to drop it again.
-
Jeff Ramin - ’67 Coupe
-
-
The key seems to be to get the filler tube somewhat in place, and then sliding the tank onto the tube from below. It's a bitch because you can only rotate/tilt the tank so much due to it being conformed to wrap around the spare tire well. I had to put a little lithium grease on the grommet to get the tube to even enter the tank, and the vent tube had to be removed. Eventually I did get the tank on the tube, so then I bolted the tank in. Next step was screwing the tube to the quarter panel.
-
-
Securing the filler tube and cap to the quarter panel wasn't as easy as planned. The replacement quarter panel had the holes drilled (slightly) in the wrong place. So, it took quite a bit of fidgeting and screwing/unscrewing before I got everything in place. The holes in the quarter panel got enlarged as a result. The same screws that hold the cap to the body also hold the tube to the quarter. Last thing is to get the vent tube back in place, which wasn't too difficult.
-
Jeff Ramin - ’67 Coupe
-
Lastly you also still need to secure the trunk floor gasket (large piece of rubber that the filler tube passes through). Note: If the piece of sheet metal that it gets screwed to has been replaced during body work, there are probably no holes for the screws. You will need to drill holes in the trunk floor with a Dremel tool.
Mounting an Aftermarket Gas Tank
-
Aluminum and stainless tanks typically don't have matching indentations. I want the tank to mount below the trunk floor pan, so I'll probably go with welded "L" tabs bolted to the trunk floor pan just to keep it from moving (not to bear the weight -- the straps will do that).
-
Ron Evans - ‘67 Coupe
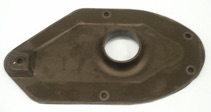
Fuel Filler Tube
-
The tube is made of aluminum.
Restoring Filler Tube
-
The vent tube in the lower region, near the trunk floor, maybe rusty. Clean up with a wire wheel and sandpaper. Solder any small holes.
-
Jeff Ramin - ’67 Coupe
Reinstalling the Filler Tube
-
The Factory Service Manual says you can install the filler tube with the tank in the body, but people on the list, and my own experience when removing it, tells me otherwise.
-
Jeff Ramin - ’67 Coupe
-
There is a foam gasket that goes between the left quarter panel and the fuel filler tube.
-
There is also a rubber fuel filler gasket that attaches to the cargo frame with the filler tube goes through.
Filler Neck Gasket
-
There were two gaskets. The one I had is listed for 67-69 A-body (9096008), and there is a wider one listed for 70-74 A-body (9096008A, 180 degrees compared to the other one).
Aftermarket Filler Neck Gasket
-
Jim's Auto Parts has the same piece for $29. I just put one in my ‘67 Barracuda and it works great. Save a few dollars!
-
Dr. Bob Breed - ’67
-
-
R/T Specialties has it for $25.
-
GT-2883A or GT-2883 both are more than $33.00. The GT-1831 would be the same he and I have.
-
Gerald Drury
Fuel Slosh
-
Fuel slosh happens while you are filling your car. All of the old cars had that problem. To be specific, it will fill fine for a while and then backwash and shut the pump off. When it is near full, it will sometimes backwash and spew gasoline out onto the ground. It doesn't happen all the time, but more when you pump faster. To prevent, try the following:
-
-
1. Press the nozzle into the car with considerable force the entire time your filling
-
2. Adjust pressure and position to prevent it from leaking down the side of the car
-
3. Adjust flow to prevent it from backwashing and shutting off the pump
-
4. Stand back as it gets closer to full in case it spews gasoline all over.
-
Nathan Nuttall - ’67 Fastback
Anti-Siphon Device
-
Regarding fuel filler tubes and fuel slosh, someone recommended this device as a fix.
-
Jim Conner - ’68 ‘Cuda
-
My car came with an anti-siphon device inserted into the fuel filler neck, and it was terrible. You had to dribble the gas in at the lowest flow rate, and even then it would shut off every few seconds. You could be standing there for 20 minutes trying to fill the tank, on certain pumps with high delivery rates. The thing was designed to not be removable. I eventually had to replace the filler neck to be rid of it.
-
-
Anyway, I have never heard of any problems with "slosh", but I can definitely recommend against restricting the filler neck.
-
Max Heim - ’67 Fastback
-
-
I AGREE!!! I had an anti-siphon device that was a coiled spring that fit into the tube. Had to remove it with a set of pliers and a screwdriver... real fun. Took forever to fill up. I have never had a fuel slosh problem when you stop filling up when the pump clicks off.
-
Rob Robinson - ’68 Fastback
Fuel Vent Tubes
-
They have a vent tube running in the trunk parallel to the fill pipe. There is barb on the filler tube that the vent line is connected to, it curls up then follows the filler tube down and exits through the truck filler tube seal to under the car. ’69 & ’68 are the same! That vent tube connects up high on filler tube and just dumps through the the trunk floor gasket to the atmosphere!
-
Gerald Drury
-
That little vent tube runs from the tank and joins the filler neck up near the top but before the gas cap -- so the cap seals off both the filler tube and the vent tube!
-
Ed
-
The way it works is that the vent tube is exposed when the spring is compressed (or expanded. That is, when you draw down the fuel level in the tank, it pulls the seal away from the vent opening so it can pull in air -- that is, maintain atmospheric pressure instead of creating a vacuum. Otherwise, the fuel pump would have to work harder and harder as the tank emptied, and eventually it would suck the tank flat. Which actually happened to me when the vent tube clogged.
-
-
So, the vent doesn't release tank pressure into the atmosphere -- it relieves tank vacuum by introducing atmosphere. So that's why it is the same on early emissions package cars -- it doesn't release a lot of gas fumes. Only CA found it necessary to regulate evaporative emissions.
-
Max
-
Fastback cars have big loop at the top that seemingly only allows the fumes to vent out under the car in extreme expansion conditions.
-
Gerald Drury
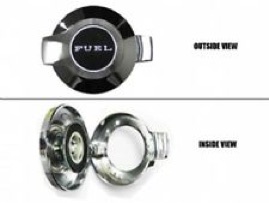
Gas Cap
-
Our ‘67-69 Barracudas use a spring loaded gas cap which holds pressure but acts as a relief valve above a certain pressure. The cap doesn't appear to be vented until a certain pressure is met.
-
The spring on the flip top is just to keep a seal to the filler so fuel can not slosh out the side and all over your nice paint. All venting is done through the small vent pipe. The connection on the filler is always open to atmosphere. Look at the filler pipe pic you posted. The nipple for the vent tube is much lower than were the cap is. I don't think even CAL cars had charcoal canisters in ‘68, least not Barracuda's!
-
Gerald Drury
Gas Cap Restoration
-
If one carefully drilled the roll pins holding the cap to the base and the little spring-loaded clip without going all the way through, everything could be separated.
-
-
The plunger with the big spring on the base has a hole. Pop a driver though the hole and unscrew.
-
-
Drill the roll pins out and when time to assemble, drive new ones in!
-
Gas Tank Lock / Fuel Filler Tube Locks
-
If you are worried about someone messing with your gas tank, they make filler tube locks (fits inside the tube and has a key) for Barracudas and Chargers with the flip top. It may also help with slosh since it covers the hole.
-
Rob Robinson - ’68 Fastback
-
You can buy a ‘68 Mopar gas lock! They are not original.
-
-
There is a chart of locking gas caps made by Stant. They don't list gas caps for ‘67-69 Barracudas, but they do for Valiants.
-
-
Stant 10572 locking cap fits Valiants:
-
‘68-69
-
1970 without CA emissions
-
1971 late
-
1972-75
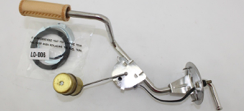
Fuel Pickup and Sending Unit
-
The pickup and sending unit are located inside the tank. It’s location depends on body style and year of the ‘Cuda. They are on the front or the passenger side of the fuel tank.
-
-
The needle position on the gauge comes from resistance to ground at the sending unit in your fuel tank. A variable resistor and mechanical wiper change the resistance, and, therefore, the current flow though the gauge. When the float is low (low fuel) we get high resistance to ground from the power source, and the needle reads low. When the float is high (full tank) we get low resistance to ground and the needle is on F.
Fuel Sending Unit Testing
-
You may get a faulty reading from the fuel gauge. A simple test lamp shows how we get fuel level indication by testing the fuel sender float arm. You can test the arm in the full to empty limits and get the 10 ohms to 72 ohms, but the float can still have a pinhole leak which makes it heavy. Take the float out of the arm and shake it. If there is some in there, just pop a new float from a spare and it’s fixed.
-
Mike Wingeier - ‘67 and ’69 Fastbacks
-
Take a reading in the full to empty limits and get the 8.6-10.6 ohms to 61-85 ohms, but the float can still have a pinhole leak which makes it heavy. Take the float out of the arm and shake it. If there is some in there, just pop a new float from a spare and it’s fixed.
-
Mike Windier - ’67 and ’69 Fastbacks
-
-
If testing on the car, the ground at the tank strap needs to be in place, and the wiring, right up to the gauge, needs to be good.
DIY Fuel Sending Unit Repair
-
Don’t attempt to clean and repair a fuel sending unit, chances are it too far gone. But you can get a new sock, and float, and gasket.
-
If you do plan to reuse your fuel level sending unit, solder any pin holes in the float part of the unit. Then bench test it. Use a multimeter. You can can see the resistance change as you move the float arm through its range of motion. My needle is very shaky. I don't know if that is normal, or indicates problems with the sending unit, but I at least know it's not completely dead. I'll install it and hope for the best.
-
Jeff Ramin - ’67 Coupe
Fuel Sending Unit Disassembly
-
Empty the tank of fuel. Be carefully of the drop lights while under there also. There was a thing in the news awhile back where someone was working under the car on the fuel system and the drop light was 'splashed with the cold fuel and it exploded the bulb and that ignited the fuel.
-
Just a warning to be carefully when working on these things guys!!!!
-
Carl
-
-
Disconnect the fuel line, vent line, ground strap, and fuel gauge wire. Unplug the wire and disconnect the grounding strap and the gas line. There is a ring with three tabs that has to be turned counterclockwise to make everything come loose. You 'may' need to clean all the road grit and dirt off the rings to find them. Take a small hammer and flat-ended brass or bronze type punch to tap on the tabs to turn the the ring counterclockwise.
Fuel Sending Unit Float
-
With a tank of really old gas in it, the "floater" will pretty much be a "sinker". It was plastic and will spring a leak. Replace the sending unit, specified for this car. Get one from Jim's Auto parts.
-
Max Heim
-
-
Depending on how many years gas has been in the tank the screen on the end of the metal line may be history and also the part of the float that tells the gas gauge how much gas is in the tank may be totally gone because of rust. I just went through this because I did not pull the tank and have it cleaned out when the car went into long term storage.
-
Darrell Stephens
-
-
You can get the brass barrel float identical to the original for about 4 dollars, from FORD. They may also have a plastic version. It is a standard stock item for them.
Fuel Sending Unit Pickup Socks
-
These pickup socks go on the end of the tank pickup. You may find the filtration sock on the end of your fuel pickup is nonexistent. Over time, the fuel and chemicals mixed in the fuel will make the fabric sock brittle, and it eventually disintegrates. Your main fuel supply line may be corroded internally. The fuel-level float might also be full of fuel, which explains a gauge reading empty.
-
-
-
The first one is for 5/16ths line. The second one is for 3/8ths line.
Fuel Sending Unit Restoration Shops
-
I have used John Wolf and Co to rebuild sending units and have not used the new units that do not work right. They have a 3 day turn around and you get your sending unit back all rebuilt and they work correct. The phone is (440) 942 0083 Willoughby Oh. I have sent units there for a number
-
of years.
-
Max Heim - ‘67 FB, ‘67 Conv.
-
-
I used Tri-Star. Quick and friendly service. He Includes a new lock ring and gasket. The sending unit is calibrated to run 72 Ohms (empty) - 10 Ohms (full). 1 year warranty.
-
Angel Garrido - ’69 FB
-
-
Tri-Star, LLC
-
Daniel O’Hora
-
1452 State Rte. 89
-
Seneca Falls, N.Y. 13148
-
(315) 712-0071
-
Aftermarket Fuel Tank Sending Units
-
The “new replacement” sender units they sell for A-bodies are almost completely useless. The shape of the pickup tube is different, the shape of the float arm is different, the pivot position of the float arm is different, and the resistor wire coil is wound differently. The result is, it does not accurately show the empty point, the full point, or any point in between, and it can only be adjusted to show one of these (take your pick). About as useful as a stopped clock.
-
-
Check YearOne for a new pickup and sending units for your ‘Cuda. The YearOne sending unit is an all new part, not remanufactured, and comes complete with a new filtration sock. The new unit slides right into the tank and comes with a new gasket and locking ring to hold it in place.
-
Aftermarket tank sending units are mostly all rip-offs that don't duplicate the original electrical-wise. The makers want you to re-calibrate your dash gauge, which does not seem to work out.
-
-
I had to buy 4 different senders to get one that worked correctly, that worked for me. The one I bought from Jim's auto parts was least expensive of all 4 and worked the best!
-
Dr. Bob Breed - ’67
-
-
It’s recommended to drain and flush the fuel tank before installing the new pickup.
Fuel Tank Sending Unit Gasket
-
A gasket goes between the sending unit and the fuel tank. If it is askew it can leak. If lock ring not done right it will leak. If you see a leak from the tank, it is probably that gasket.
Fuel Tank Sending Unit Wire
-
The Fuel Tank Sending Unit Wire is part of the Rear Tail-Light Wiring Harness. Everything is simple to replace except the fuel tank sending unit wire. The connector is located in the trunk on the driver's side. The sending unit wire run towards the middle of the car under the trunk area carpet (below the rear window). To access the area in order to run the new wire down to the fuel tank you need to pull the floor panel. The back seat will need to come out and the trunk-interior divider, some interior panels, etc.
-
-
You can also un-bolt the panel that separates the trunk area from the inside of the car. If you do that, you could access the fuel sending wire that runs under the rear floor panel.
-
Lee - '67 & '68 fastbacks
Fuel Tank Sending Unit Lock Ring
-
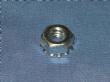
You can get a replacement from Dorman #579-006.
Fuel Gauge Troubleshooting
-
What if your fuel gauge doesn't work. There is an easy fix.
-
-
It might be a simple grounding problem at the sending unit.
-
-
With the key on have somebody watch the gauge while you go under the car and unhook the wire from the sending unit and touch it to go ground. It should go to full. Don't hold it there just long enough to see if the gauge moves. If the gauge works then make sure that the sender is grounded. There should be a strap on the gas line at the sender to past the rubber hose connecter to the main fuel line for ground. You can also take a wire and fasten to the sender and route to a body ground.
-
-
If doing the above and the gauge works but improving the ground doesn't cure it the sender is bad. The float may be sunk. You can check the sender by removing it and attaching a ground to it and hooking up to the gauge wire and moving the float up and down and seeing if the gauge works.
-
-
If the float is bad, you can get a replacement from your local friendly Ford dealer, as Mopar doesn't sell one. The Ford float is the same, cost about $4. Ask for one barrel float like in an early Mustang.
-
Ford part # coaz-9202-b Brass float. mdr
Gas Tank Grounding Strap
-
There is a grounding strap on the fuel line coming from the gas tank that grounds the fuel pump so that it will work when everything goes back together. The grounding strap is attached to the metal line coming from the tank and the metal line going to the fuel pump. It attaches on both sides of the rubber hose used to attach the metal line going to the fuel pump and the metal line going to the float/sender unit in the tank.
-
Darrell Stephens
-
-
A different approach is to solder or braze a ground strap to the sender while it is out of the car. That way you have a solid ground connection that always works. Just stay away from the plastic insulator with the heat.
-
Nathan Nuttall - ‘67 Fastback
-
-
The zinc used where I work dries to a dull gray and can be top coated. I painted the outside of my tank with this and will paint the gas tank straps with this same paint.
-
Darrell Stephens
Aftermarket Gas Tank Grounding Strap
-
You can purchase a repro from Mancini Racing. Not good. The quality of the steel was lousy. The clips on the ends of the strap, which are supposed to be spring steel so they snap around the metal fuel lines, but bent outward when it was pushed on. An experienced Mopar guy said the heat treating on the steel was done incorrectly or not at all when the repro clips were made. His recommendation was to stay with the factory original clip if possible.
-
Steve Toth
Supplemental Fuel Cell / Tank
-
An idea is to put a fuel cell/tank in the spare tire well, one that I can easily pull out and empty if you won’t use the car often. You can get fuel cells in Steel, aluminum and plastic, starting at 5 gallons and going up to probably 32 gallons.
-
-
Try Bob Mazzolini Racing in Riverside CA. for about $150.
-
Phil Saran
Voltage Limiter for Gauges
How the voltage limiter works
-
The voltage regulator inside the fuel gauge is a simple bi-metal strip that has coils of small insulated circuit wire wrapped around it. There is a make/break contact at one end. When the contact is closed, voltage flows through the coils of wire and heats up the bi-metal strip arm. When the arm reaches a certain temperature, the bi-metal arm arcs and breaks the contact. When the arm cools, it closes the contact and the cycle starts over.
-
-
Therefore the "regulated" 5 volts to run the gauges consists of voltage pulses to the gauges that "look", on average, to be around 5 volts.
-
NOTE: The term “voltage limiter” is no longer in common use.
Problem
-
On some cars the fuel gauge seems to never read totally full and when driving it for awhile it seems to fluctuate, between the high reading and almost empty and back. The problem could be the limiter (or fuel gauge on Barracudas), the sending unit, the wiring, or the circuit board pins.
-
-
The voltage regulator bi-metal arms in our gauges are notorious for sticking when the contacts on the end of the arm close - hence full scale indication. Over time the bi-metal arm gets fatigued from years of use, which causes low gauge readings. Combine them together and you get low gauge readings with an occasional Full indication (as when you first turn on the ignition and all the gauges peg to the right side).
Testing the Voltage Limiter
-
Here's an article on testing the voltage limiter:
-
http://www.moparmusclemagazine.com/techarticles/interior/23241_instrument_gauges_repair/
Solution
-
First check the ground connection between the dash and the rest of the car. Make sure it is good, even if you have to run a new ground wire between the dash cluster and the car chassis.
-
-
Second, install an electronic voltage regulator. The info is in the archives. Raj and Dr. Bob did some nice photos of how it's done. You can either buy a voltage regulator on a website for $70, or buy the parts for about $2 at Radio Shack and build it yourself if you can solder. Or, ask someone on the list to put one together for you, once you decide how you want to install it, and offer to pay for the parts and postage.
-
-
You can install it either on the rear of the instrument cluster, or mounted on a heat sink somewhere else with leads going to the instrument cluster. The easiest install posted was Dr. Bob's. He built it on a heat sink and mounted it on the steering column with wires going up to the back of the instrument cluster and just attaching to the proper connection points with no internal mod to the gas gauge (all the other installs I've seen or done have opened up the gas gauge and removed the bi-metal strip regulator).
-
-
NOTE: Important! You have to use a heat sink with the regulator if you want it to operate without failing from overheating. This can be any hunk of metal - I used a piece of angle iron mounted on the steering column of my dodge B250 van. Or it can be mounted on any large piece of metal,even the metal gauge cluster itself which works fine. And, you have to use heat conducting grease between the heat sink and the regulator to insure good heat transfer.
-
-
To proceed involves the "dash board boogie" - removing the dash cluster. Check that the pc board screws are tight, all the bulbs are good, there are no broken pc board pins, the connections between the pins and the boards are good, etc. And, if you remove the cluster, a convenient place to mount the regulator is where the AM radio filter capacitor is mounted (that fat little cylinder with a clamp type mount around it and a black wire coming out of one end) - it's not needed anymore due to the demise of AM radios and point type ignitions. So, you can disconnect and remove it and mount the regulator in it's place.
-
Steve Toth
-
-
The part available at Radio Shack is the uA7805 Fairchild voltage regulator. The reason I recommended it is it flat out works and is virtually indestructible. Build it and forget it - my type of device. The reason for the heatsink is for output of current in excess of 1 amp. No external components are really needed with the device - you usually add a small capacitor, I use a small tantalum of virtually any value rated above 5v, across the output to reduce the possibility of any voltage transients. Internally it has 17 transistors for voltage regulation, internal thermal overload protection and internal short circuit protection. It can take any input voltage from 5v to 24v and output a steady 5v within 1%.
-
-
Last time I priced one at Radio Shack it was $1.50
-
-
So, attach it to a small piece of steel/iron with a 6-32 screw, lock washer and nut, mount that on your steering column, run wires up to the back of your gas gauge and you're good to go.
-
Steve Toth
-
-
Yes, very interesting. I've never seen a switching power regulator that small. I'll have to try that the next time. Most of the work in doing these things is in making a proper heat sink. This would make it easy.
-
Nathan
-
-
I've done both the homemade version with radio shack parts and just last summer went the RTE model. Was satisfied with both options,
-
Bill Gasser '- 69 fastback
-
-
With all this said, a solid state limiter is a good idea anyway.
-
Jim Lusk
-
-
The shop manual does show a separate regulator.
How to Build a Voltage Limiter
-
It's in the tech archives at:
-
www.moparts.com. http://www.moparts.org/Tech/Archive/elec/11.html
-
Jim Lusk
Reference
-
Here's the thread from FABO.